

on Aug 2, 2017
Sometimes you get so used to a feature in one application, you expect it to be the there in all the other applications you use, especially when the applications are in the same suite, like Microsoft Office.
In Microsoft Word, it is trivial to create a Table of Contents - flip to the References tab, click the Table of Contents button and Boom! - one is created for you. Then it is just a matter of remembering to update it when you finish editing your document.
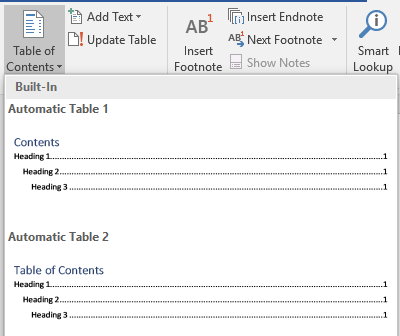
The Table of Contents Wizard in Microsoft Word
But, in Microsoft PowerPoint, it isn't that simple.
PowerPoint Built In Options
PowerPoint has 3 ways of building a Table of Contents:
- Drag Slides into the content area
- Use Outline View
- Manually Build it
Let's go through each of these.
Dragging Slides
To create a quick Table of Contents by dragging:
- Create a new slide to act as your Table of Contents.
- Scroll the Thumbnails Pane on the left to find the slide you want to add.
- Drag and drop it on the slide.
You can see an example of this style below. An image of each linked slide is added to the contents. In Presentation mode, these are clickable and will take the viewer to that slide.

An example Table of Contents created by dragging and dropping
Advantages
Drag and drop is easy! The linking and images are done for you. Easy to quickly create a top level table of contents.
Disadvantages
There is no easy indicator that you can click or what page number these are on. If you are creating a PDF of the presentation to send out, the viewer might not even know they can click. The linked slide images might also not be the right style or layout for this type of thumbnail. If you want to do more than a few slides, this can be difficult to lay out nicely.
Using Outline View
To create a detailed Table of Contents using Outline View:
- Create a new slide to act as your Table of Contents.
- Go to the Outline view.
- Right-click in the Outline page and choose Collapse All to show just the slide titles.
- Drag to select the slides you want. (Note: you can hold Ctrl while dragging to select individual slides instead of one huge group)
- Right-click on a selected slide and choose copy.
- Go back to your new Table of Contents slide and choose paste.
- Edit and format the list of slides.
You can see an example of this style below. All of the slides you copied appear in the list, but there are no page numbers or links added automatically.

An example of a Table of Contents created by Outline View.
Advantages
If you want a lot of slides titles for a detailed Table of Contents, then this is the easiest way to get them. With a little work, you can add hierarchy, page numbers, formatting, and hyperlinks.
Disadvantages
Getting just the slides you want can be painful and so is finding and adding the page numbers and links. More work in formatting this to look nice, since it is just text. You have to manually update page numbers when they change.
Build it Yourself
To create a custom Table of Contents yourself
- Create a new slide to act as your Table of Contents.
- Create a base shape and format for each slide.
- Duplicate this for each new slide.
- Add page numbers and links manually.
You can see an example of this style below. Each slide is a group of custom shapes, including a short description and the page number that the slide is on.

An example of a custom Table of Contents
Advantages
You can make this look exactly how you want and add additional information for each slide.
Disadvantages
You have to manually add the page numbers and links and update page numbers when they change. If you end up with more pages than you expect, you might have to lay out everything again.
Semi-Automatically Updating Page Numbers
If you choose the Outline or Custom methods above, one of the biggest issues is that the page numbers displayed can quickly get out of date, even if the links stay correct.
The solution is a simple VBA function that goes through the hyperlinks and updates the page number to match the current value. Simply run this macro and it will do its magic. A few caveats:
- The macro expects your Table of Contents to be on Slide 2. If it isn't, update the 2 in "Set pTableOfContent = ActivePresentation.Slides(2)" to the correct slide number.
- The macro expects that you have already created some hyperlinks on that page to update. If you haven't yet, go to your Table of Contents and create hyperlinks to the appropriate slide with any display text "Ex. Page X". Then run the macro and it will update them.
Macro Code
Sub TableOfContentUpdater()
    Dim pTableOfContent As Slide
    Set pTableOfContent = ActivePresentation.Slides(2)

    For Each pHyperLink In pTableOfContent.Hyperlinks
        Dim pLinkNumber As String
        Dim pLinkedSlide As Slide
        pLinkNumber = Left(pHyperLink.SubAddress, InStr(pHyperLink.SubAddress, ",") - 1)
        pHyperLink.TextToDisplay = ActivePresentation.Slides.FindBySlideID(CLng(pLinkNumber)).SlideIndex
    Next pHyperLink
End Sub
I hope this helps you create and manage your Tables of Content as easily as it does for us. Let us know in the comments if you have any questions.
Topics: Analytics